

You are out of the house, three hours from your next real meal, and your protein target is still mostly untouched. The gas station shelf offers a bright wrapper promising twenty grams of protein and no added sugar. Homemade Energy Bars exist because that wrapper, for a post-bariatric pouch, usually causes more trouble than it solves. Fifteen minutes in your own kitchen fixes the problem for a whole week.
Key Takeaways
- Store-bought bars often combine sugar and fat, the classic trigger for dumping syndrome.
- Soft, chewy bars slide past your pouch and leave you hungry within the hour.
- A good bar starts with protein isolate, not with oats, dates or syrup.
- Cutting an 8×8 pan into sixteen squares keeps the portion honest.
- The bars keep one week in the fridge and three months in the freezer.
- Your dietitian sets your protein target and tells you when bars fit your stage.
Why Store-Bought Bars Fail After Surgery
The bar in the health food aisle was designed for a marathon runner, not for a pouch the size of an egg. Manufacturers build for taste and shelf life, so the ingredient list follows their priorities rather than yours. Reading the panel on the back takes ten seconds, and it usually settles the question.
Sugar, Fat and Dumping Syndrome
Sugar and fat arriving together is the combination most likely to provoke dumping syndrome, as the Mayo Clinic explains in its overview of dumping syndrome. Store-bought bars deliver both at once, and they hide the sugar behind friendlier names.
- Hidden sugars: honey, agave nectar, date paste, brown rice syrup and evaporated cane juice. Your small intestine reads every one of them as a concentrated sugar load.
- High-carb binders: rolled oats, crisp rice cereal and granola hold the bar together while spiking blood sugar and fading fast.
- Fat as a substitute: keto-style bars swap sugar for fat, and fifteen to twenty grams of it can bring nausea and foamies.
Slider Foods and the Grazing Cycle
Texture matters more than most labels admit. A soft, chewy bar needs almost no chewing, so it passes through the pouch quickly and bypasses the restriction your surgery gave you. Fullness never arrives, hunger returns inside an hour, and grazing fills the gap.
The psychological side deserves a mention too. A sweet, candy-like bar reawakens old cravings, and that battle is harder to win than the nutritional one. A savory snack rarely does the same thing. Our list of high-protein bariatric snacks leans toward eggs, cheese and roasted chickpeas for that reason.
Homemade Energy Bars Put You Back in Charge
When you make homemade energy bars yourself, every decision on the label becomes yours. That shift matters more than any single ingredient, because it turns a gamble into a known quantity.
- Protein: unflavored whey isolate or collagen peptides, rather than the cheap soy isolate that fills commercial bars.
- Sweetener: monk fruit, allulose or stevia, none of which raise blood sugar the way syrup does.
- Fat: a small, measured spoonful of natural nut butter for binding, not a caloric shortcut to good flavor.
- Texture: almond flour, chia seeds or flax meal give the bar something your pouch can actually register.
- Portion: a one-ounce square instead of the 250-calorie slab the store sells as a single serving.
Protein carries a particular weight after surgery, since your body needs it to rebuild tissue while you eat far less overall. The MedlinePlus page on dietary proteins covers the basics well. Your own daily target, though, belongs to your surgical team rather than to any article.
What Goes Into Homemade Energy Bars
Homemade energy bars that work have four parts, and each part has its own job. Get the proportions right and the rest is mixing.
The Protein Base
Protein must lead by volume, which is the single line that separates a bariatric bar from a granola bar. High-quality unflavored whey isolate gives the most protein per gram and keeps carbs low. Vanilla whey isolate makes the flavoring easier, and collagen peptides suit anyone who tolerates whey poorly. Plant-based eaters will find more options in our guide to high-protein vegetarian bariatric recipes.
The Binder That Holds It Together
The binder is where most recipes go wrong, because dates, honey and agave bind beautifully and behave terribly. Sugar-free fiber syrups work best, since they hold the dough without the sugar load. Small, measured amounts of natural nut butter also work, and powdered peanut butter mixed with water keeps the fat down.
Flavor, Texture and Sweetness
Fillers can add body without adding sugar: almond flour, coconut flour, powdered peanut butter, chia seeds and flaxseed meal all qualify. For flavor, reach for sugar-free extracts, citrus zest, unsweetened cocoa powder or instant coffee. Sugar-free chocolate chips, cacao nibs and unsweetened shredded coconut cover the treat side.
Protein powder alone tastes flat, therefore a bariatric-safe sweetener usually earns its place. A powdered monk fruit and erythritol blend, allulose or pure stevia all work well here. Liquid sweeteners belong in the recipe only when they also serve as the binder.
Store-Bought Versus Homemade Energy Bars
| What matters | Typical store bar | Your own bar |
|---|---|---|
| Sweetener | Honey, syrup, date paste | Monk fruit, allulose, stevia |
| Fat | 15-20 g, often from oils | A measured spoon of nut butter |
| Texture | Soft, chewy, slides through | Dense, needs chewing |
| Portion | One 250-calorie bar | A one-ounce square |
| Cost | Two to three dollars each | Pennies per square |
The right-hand column is not harder to achieve, merely less convenient on the day you make it. Everything after that Sunday afternoon is easier than the gas station.
Three No-Bake Homemade Energy Bars
The method is identical for all three homemade energy bars, so learn it once.
- In a large bowl, mix the dry ingredients.
- In a small microwave-safe bowl, gently heat the binder ingredients for 20-30 seconds until soft and stir-able.
- Pour the wet ingredients into the dry ones and mix with a spatula, or your hands, until a very thick, stiff dough forms.
- Press the dough into an 8×8-inch pan lined with parchment paper, lay another sheet on top, and press very firmly to compact it.
- Chill in the refrigerator for at least 1 hour before cutting.
Because nothing goes in the oven, these fit the same batch-cooking hour as our bariatric freezer meals.
Recipe 1: The Classic Chocolate Peanut Butter Bar
Dry ingredients
- 1 1/2 cups (about 6 scoops) vanilla or chocolate whey protein isolate
- 1/2 cup powdered peanut butter (like PBfit)
- 1/4 cup almond flour
- Pinch of salt
Wet/binder ingredients
- 1/2 cup sugar-free fiber syrup (ChocZero maple-flavored, for example) OR 1/2 cup natural peanut butter (note: peanut butter raises the fat and the calories)
- 1/4 cup unsweetened almond milk, added one tablespoon at a time, only as needed
Mix-in
- 1/4 cup sugar-free chocolate chips (like Lily’s)
Recipe 2: The Zesty Lemon Coconut Bar
No chocolate coating means no melting, so this one travels well in a bag.
The dry mix
- 1 1/2 cups (about 6 scoops) vanilla whey protein isolate
- 1/2 cup almond flour
- 1/4 cup unsweetened shredded coconut
- 1/4 cup powdered monk fruit/erythritol sweetener
- Zest of 2 lemons
The binder
- 1/2 cup natural, unsweetened cashew butter or almond butter
- 1 tsp lemon extract
- 1-2 tbsp water, only as needed to form the dough
Recipe 3: The Cookie Dough Bar
This one tastes like a spoonful of cookie dough, and it wins over most skeptics.
Dry side
- 1 1/2 cups (about 6 scoops) vanilla whey protein isolate
- 1/2 cup almond flour
- 1/4 cup powdered monk fruit/erythritol sweetener
- Pinch of salt
Wet/binder ingredients
- 1/2 cup natural, unsweetened cashew butter, which gives the best cookie flavor
- 1 tsp vanilla extract
- 1-2 tbsp unsweetened almond milk, as needed
Mix-in
- 1/4 cup sugar-free mini chocolate chips
Portioning, Storage and Timing
Cut the 8×8 pan into sixteen squares, each one roughly two inches across. That square is a snack rather than a meal, and cutting the pan properly saves you the argument later.
These bars carry no preservatives, so they live in an airtight container in the refrigerator for about a week, or in the freezer for up to three months. Wrapping them individually stops the squares from fusing into a block. A single Sunday session covers the working week, in the same spirit as our 30-minute bariatric meals.
Timing follows the usual post-op rules. Treat the bar as a planned snack, never as something you reach for while passing the fridge. This counts as solid food, therefore you keep drinks out of the picture and wait half an hour afterward. Eat slowly, take small bites, chew thoroughly, and put the bar down between them.
Mistakes That Ruin Homemade Energy Bars
Four errors account for nearly every failed batch of homemade energy bars.
- Not pressing hard enough. Loose dough crumbles the moment you lift a square, so lean on that parchment with real force.
- Too much liquid. Add almond milk a tablespoon at a time, because a wet dough never firms up properly in the fridge.
- Cutting too soon. An hour of chilling is the minimum, and longer gives cleaner edges.
- Portioning by eye. Sixteen marked squares protect you from the slow drift toward a double serving.
Flavor fatigue is the fifth, quieter mistake. Rotating between the three recipes keeps the bars interesting, and a change of pace such as a healthy smoothie bowl or a warm bowl from our high-protein bariatric soup recipes stops any single snack from wearing out its welcome.
Good, Better, Best
Homemade energy bars are a genuinely good tool, and they beat the store-bought version by a wide margin. Even so, it helps to see where it sits on the ladder.
- Good: your own bar, high in protein, low in sugar, built from ingredients you chose.
- Better: a less processed high-protein snack, such as roasted chickpeas or something light from our summer bariatric recipes.
- Best: a whole food, which usually means a hard-boiled egg, string cheese, a small handful of almonds or plain Greek yogurt.
Stage matters as well, since bars belong to the solid-food phase and nowhere near the early weeks. Anyone still working through textures will find safer ground in our bariatric pureed food stage recipes.
Frequently Asked Questions
How much protein does one bar contain?
That depends entirely on your protein powder and how you cut the pan, so read your own label and divide by sixteen. Your dietitian can tell you how the result fits your daily target.
Can I bake these instead?
These recipes are built for the fridge, and baking dries out whey isolate badly. Chilling gives you the dense texture that keeps you full, which baking would undo.
Are sugar alcohols safe after bariatric surgery?
Many people tolerate erythritol and allulose well in small amounts, while larger quantities cause gas and loose stools. Start with a single square and see how your own system answers.
How long before the bars go bad?
About a week in the refrigerator and three months in the freezer, since nothing in them preserves anything. Freeze whatever you will not eat within seven days.
Homemade Energy Bars, Fifteen Minutes at a Time
The convenience store does not know your surgery, your protein target or your tolerance for sugar. You do, and a single pan on a Sunday afternoon turns all that knowledge into sixteen squares of something reliable. The money you save is pleasant; the steadiness is the real prize.
Start with the recipe that sounds best to you, press it firmly, and taste a square before you judge the batch. Keep your care team in the loop on portions and timing, and let the bars do the small job they are good at.
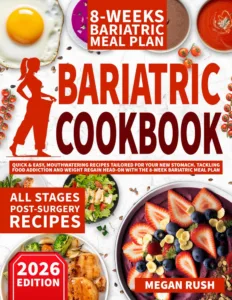
Check out the author’s book here: Bariatric Cookbook.

Leave a Reply